Create A Wrestler
Casual Pro Wrestling allows you to expand your roster by creating your own wrestlers.
There is no limit as to how many wrestlers you can create. A saved wrestlers typically requires less than 3 megabytes on your hard drive, so you can actually create a lot!
This page guides you through the wrestler creation process from the main menu to the actual editing in Create-A-Wrestler mode.
The Create A Wrestler Menu
From the main menu, you can directly open the Create A Wrestler menu.

On the left, it shows a list of wrestler templates, wrestlers created by yourself (if any) and installed wrestlers created by others. On the right, you see details about the currently selected wrestler, if any.
Creating A New Wrestler
To create a new wrestler, select a template from the Create section of the list on the left and click the Create New button that appears on the right.
Editing, Cloning & Deleting
If you select an existing wrestler in the list, you will see the available actions on the right.
Any wrestler can be cloned by choosing Clone. This creates a new wrestler that looks exactly like the selected one, which is very useful to create variations (also see Roster Entry).
If the wrestler is made by yourself, you also have the option to Edit or Delete them.
Deleting a wrestler cannot be undone. You will be prompted before this happens.
Steam Workshop Sharing
If you select one of your own creations, you will also have the opportunity to share it on the Steam Workshop using the Share button. This leads you to the sharing screen that is described on the Steam Workshop page.
Create-A-Wrestler Mode
Here you create or edit a wrestler.
Main Menu
The main menu allows you to exit Create-A-Wrestler mode with or without saving.
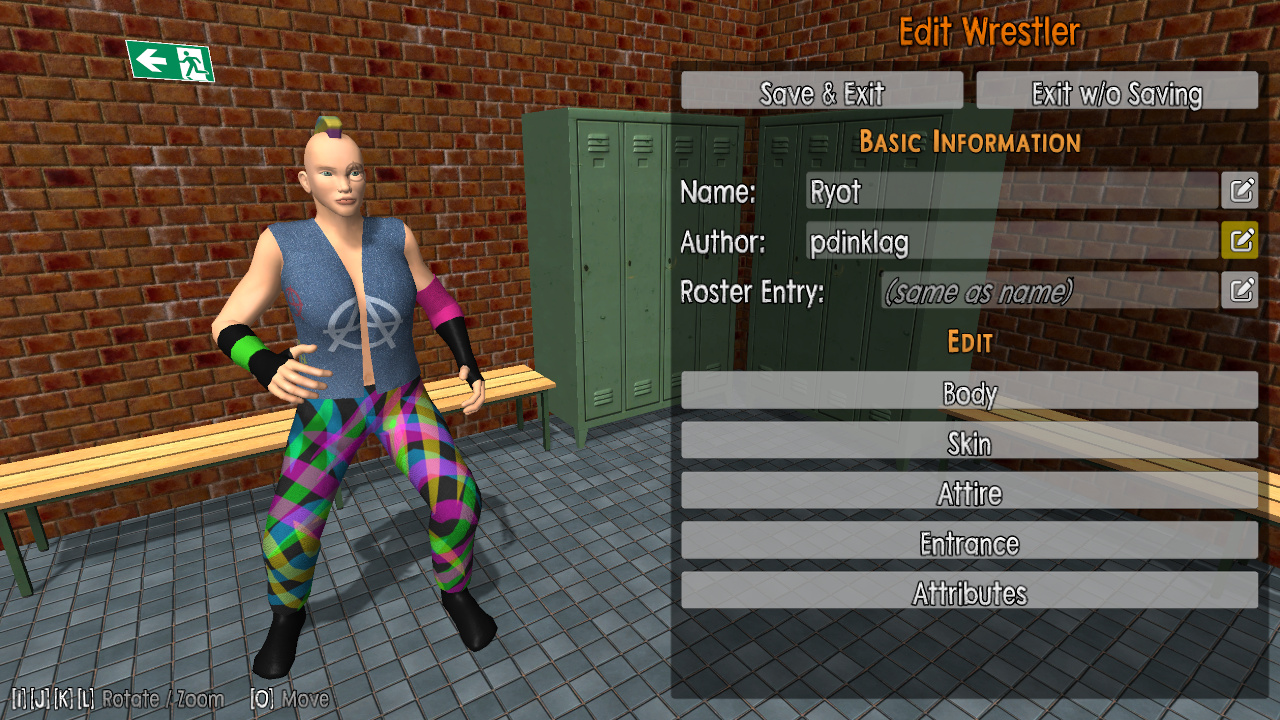
In the Basic Information category, you enter your wrestler's name and also put your own name in the Author field. By default, the Author field is filled with your username on your computer.
Roster Entry
The Roster Entry field is used to group wrestlers in the wrestler selection as described here. If your wrestler is a variation of another (e.g., the same wrestler but with different attire), put the same text into the Roster Entry field to have them grouped together.
When you set the Roster Entry, you can select whether or not your wrestler should be the preferred choice by setting Main Selection to On or Off. In case multiple variants have this set to On, the load order determines which is preferred.
If the Roster Entry is left empty, the wrestler's name is used to group them instead.
Camera Control
On the bottom left of the screen, the game shows you camera controls that you can use to view your wrestler from different angles. You can toggle between rotation/zoom and moving the camera around.
Body
This is where you shape your wrestler's body. You have a plethora of categorized morphs at your disposal to shape your wrestler using sliders.
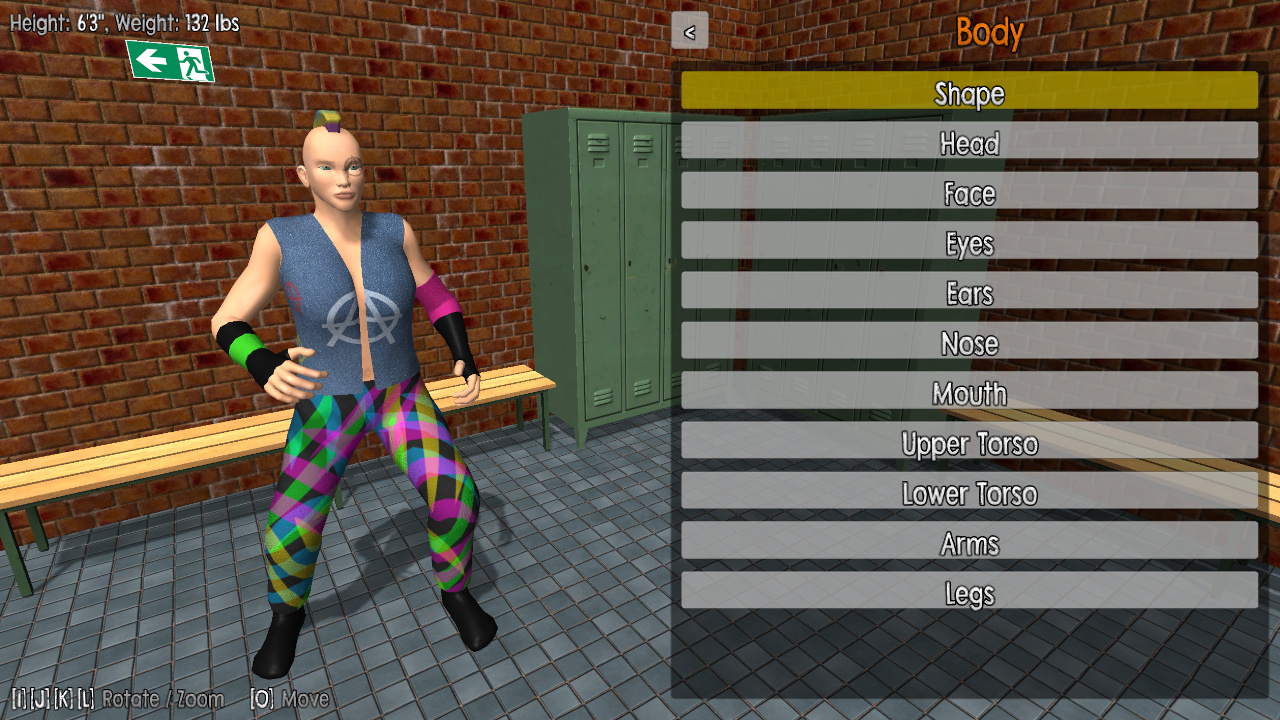
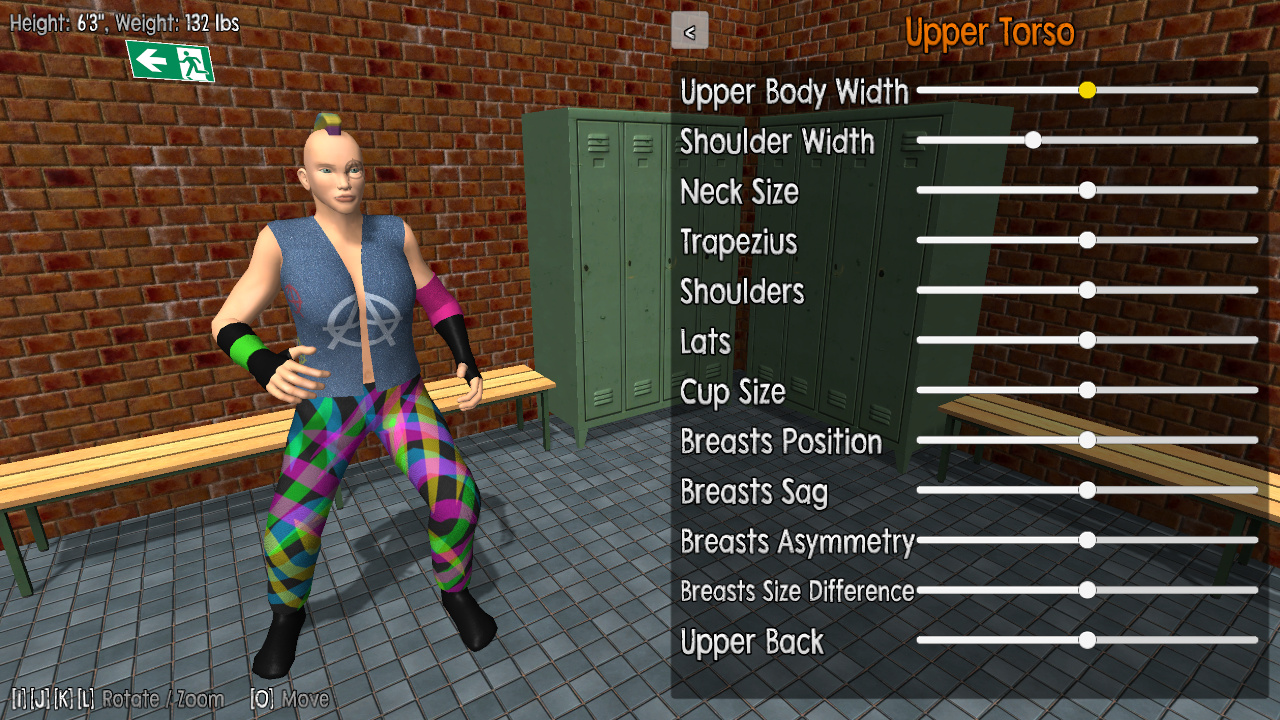
The body shape automatically determines your wrestler's Body Facts (height and weight). You have no direct control over these. While editing the body, height and weight are shown in the top left corner of the screen.
Skin
Here, you can set the color of your wrestler's skin, paint stamps onto it and also edit the wrestler's eyes. By activating Heterochromia, you can edit the two eyes of your wrestler individually. Keeping it inactive or deactivating it will synchronize the right eye with the left.
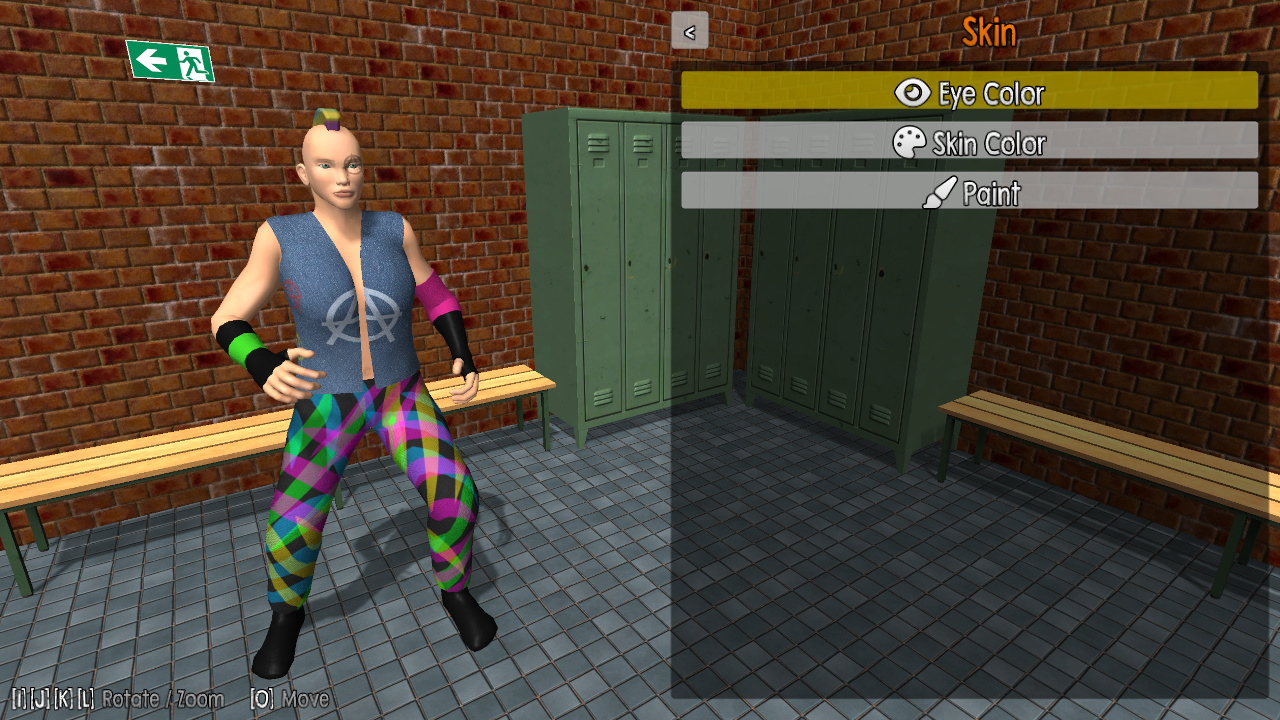
To give your wrestler eyebrows, paint mirrored eyebrow stamps onto their face!
Eyes
Here's where you select the type and color of your wrestler's eyes. Activate Heterochromia in the skin menu to edit the eyes individually.
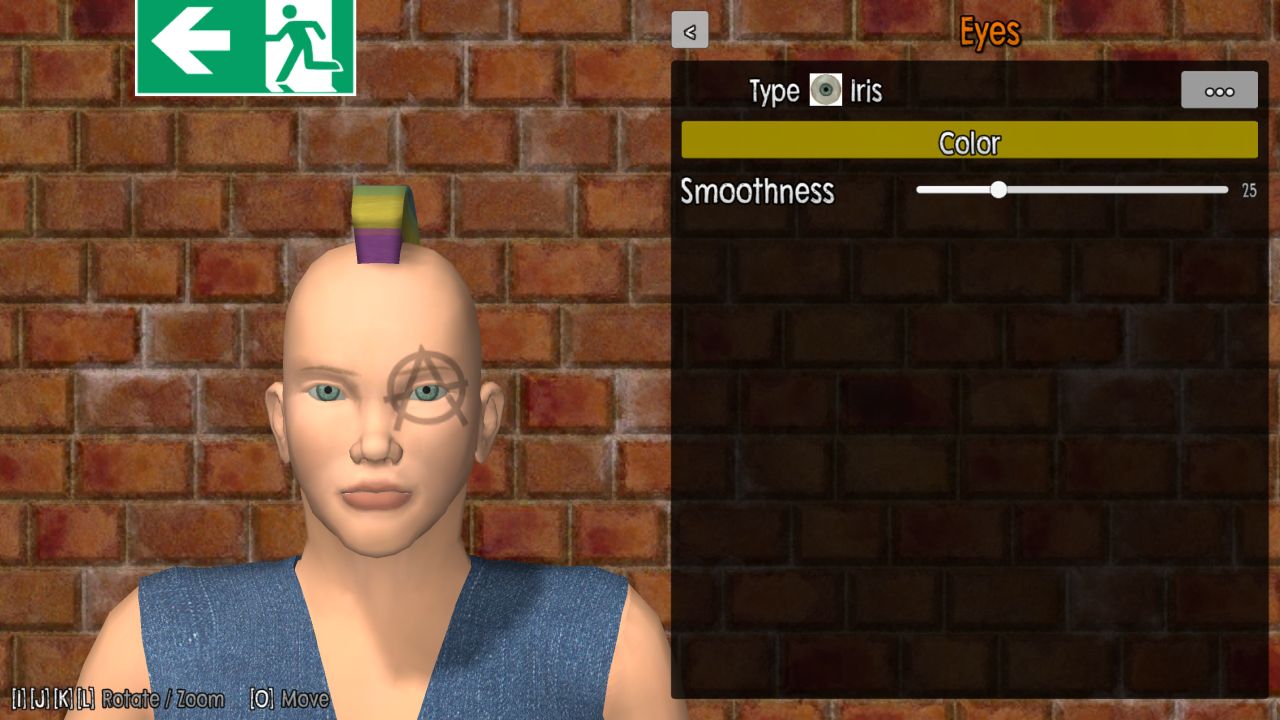
- Type: Selects the eye's main texture.
- Color: Recolors the colorful par of the eyes (e.g., the iris).
- Smoothness: Determines how the eyereflects light. Low smoothness makes it look matte, while a high smoothness makes it look more metallic.
Attire
In Casual Pro Wrestling, everything added on top of your wrestler's body is considered attire. This includes not only clothing or accessories, but also hair.
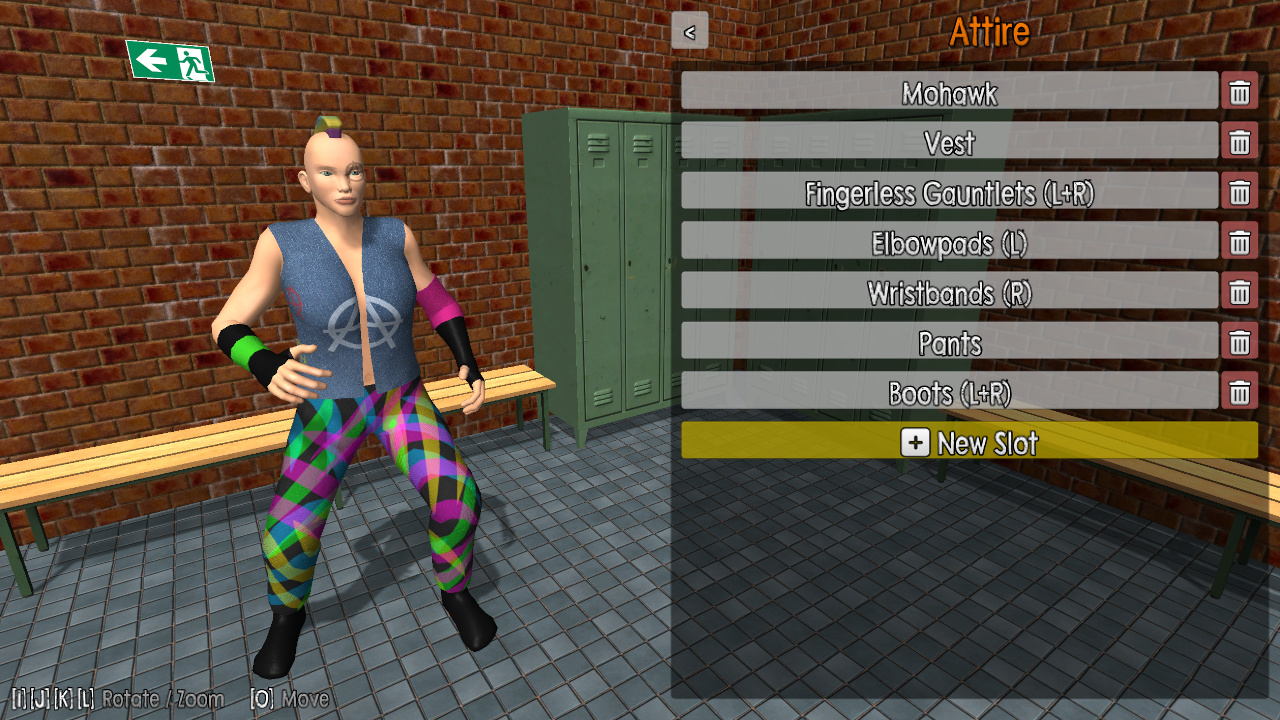
The Attire menu shows you the list of attires your wrestler is currently wearing. You can add a new attire slot by clicking New Slot, or edit an existing attire by clicking the respective button in the list. Next to each attire, you will also find a button to delete it.
Attire Editing
After selecting or adding an attire slot, this is where you choose the type of attire and edit it to your liking.
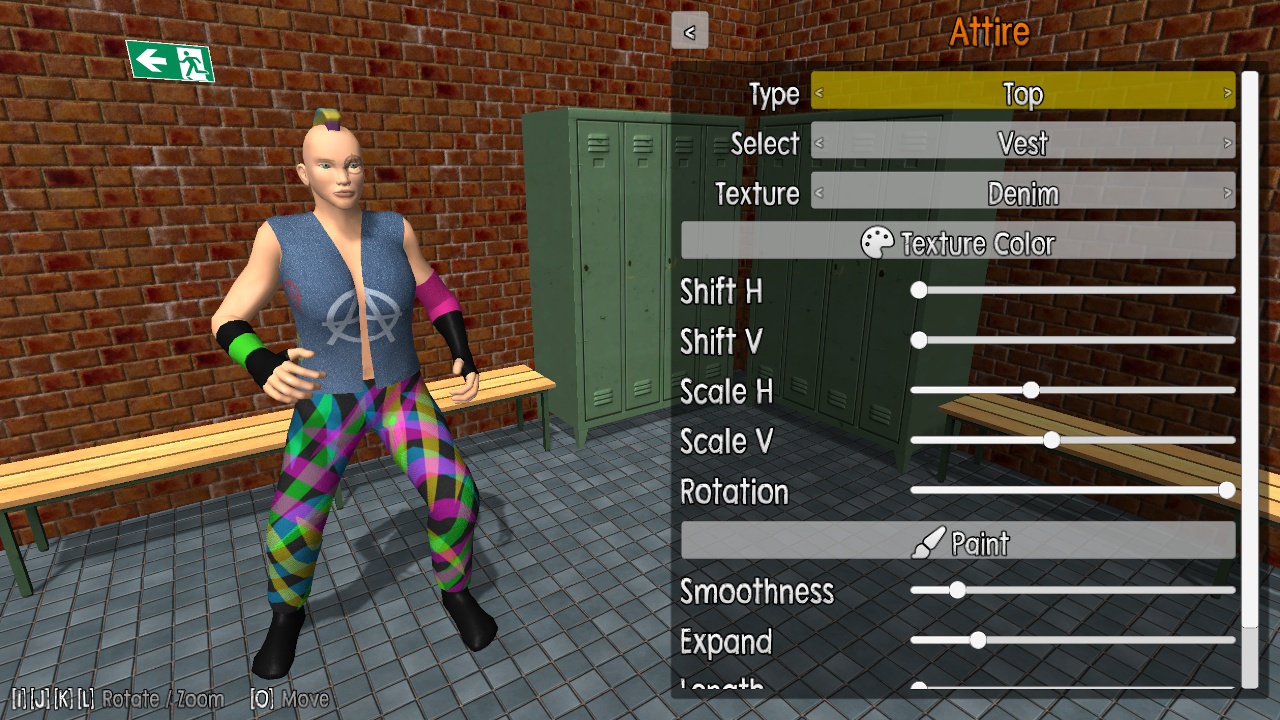
Using the Type and Select buttons, you can browse available attires in the different categories. Once you have selected one, you can edit the attire's texture:
- Teture: Selects the main texture of the attire.
- Texture Color: Recolors the attire's texture.
- Shift H: Shifts the texture horizontally.
- Shift V: Shifts the texture vertically.
- Scale H: Scales the texture horizontally.
- Scale V: Scales the texture vertically.
- Rotation: Rotates the texture.
- Paint: Allows you to paint stamps onto the attire.
- Smoothness: Determines how the texture reflects light. Low smoothness makes it look matte, while a high smoothness makes it look more like plastic wrap.
The selected attire may or may not feature additional morph sliders that will be displayed below. For example, most attires feature an Expand slider that can be very useful if multiple attires are put on top off each other. Furthermore, some attires also allow you to edit secondary colors.
Entrance
In this screen, you select your wrestler's entrance theme.
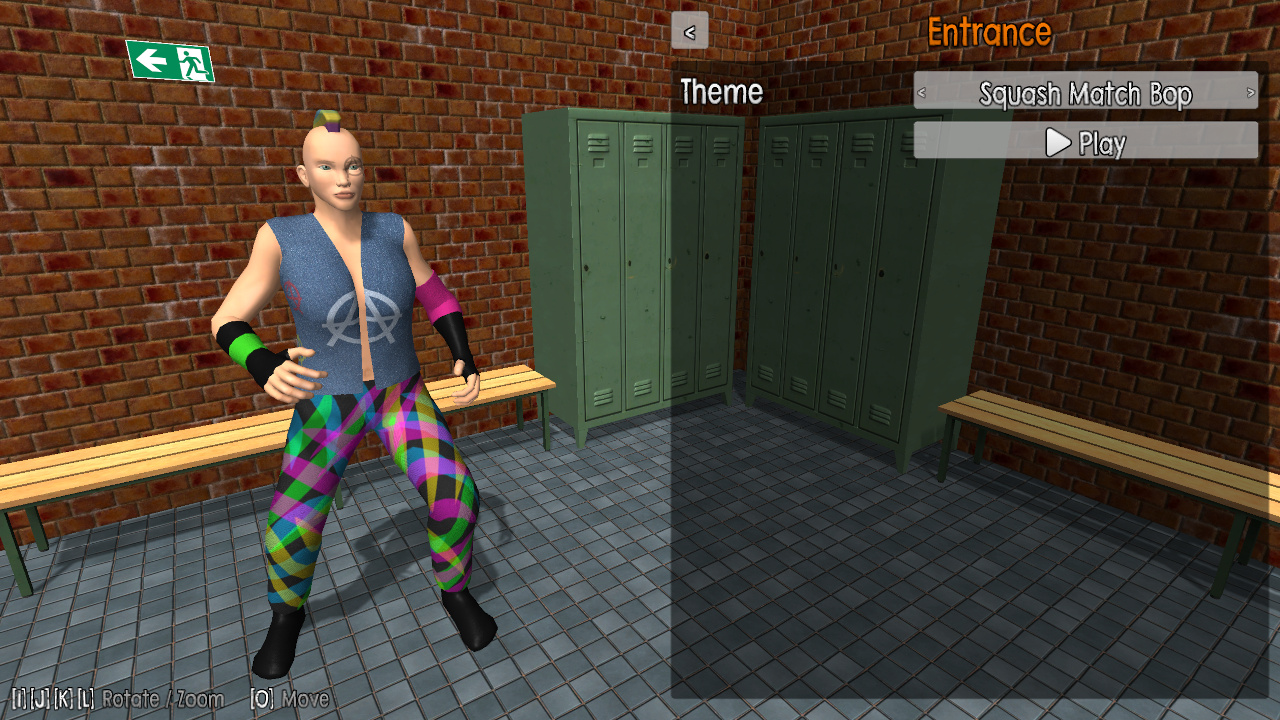
Use the Play button to listen to the themes as you browse through.
Obviously, there will be more to choose here in the future.
Attributes
Here you edit your wrestler's Attributes.
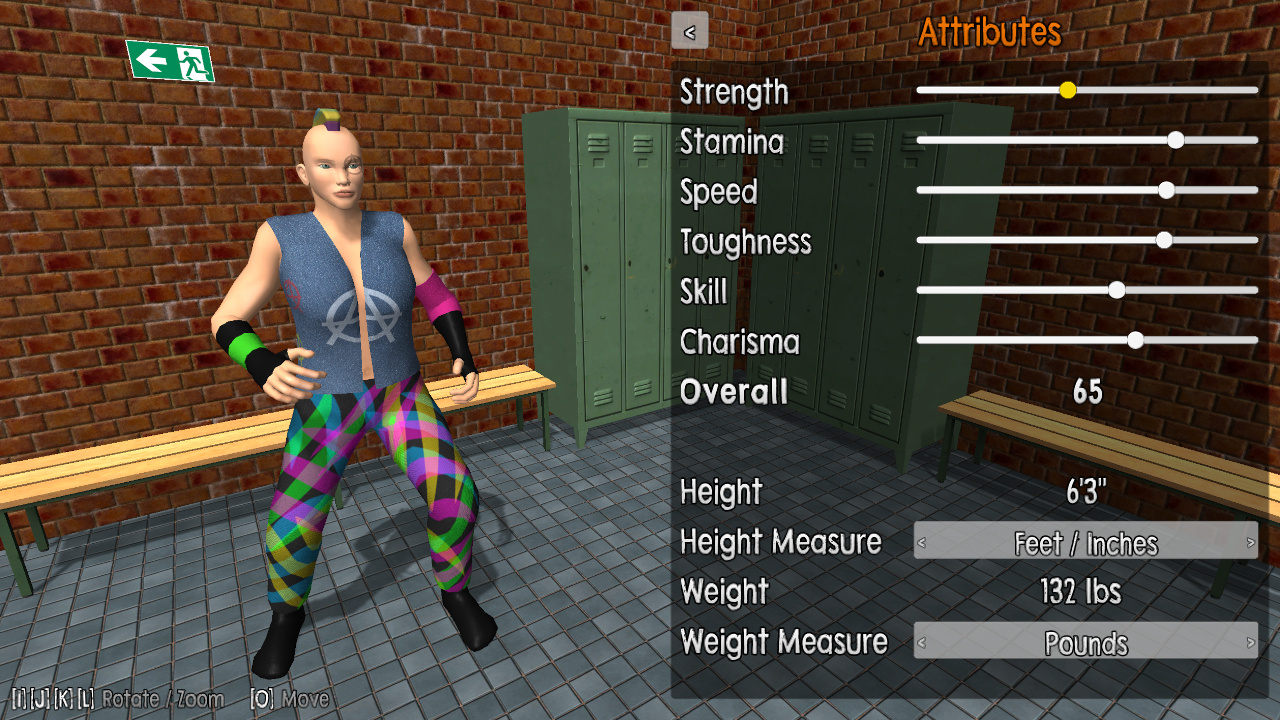
There are no limitations, you can make your wrestler extremely good or bad at will. The Overall rating is the same as shown in the Wrestler Selection.
You can choose what measuring unit the height and weight of your wrestler is displayed in on the tale of the tape.
Moves
In this mode, you edit and preview your wrestler's maneuvers.
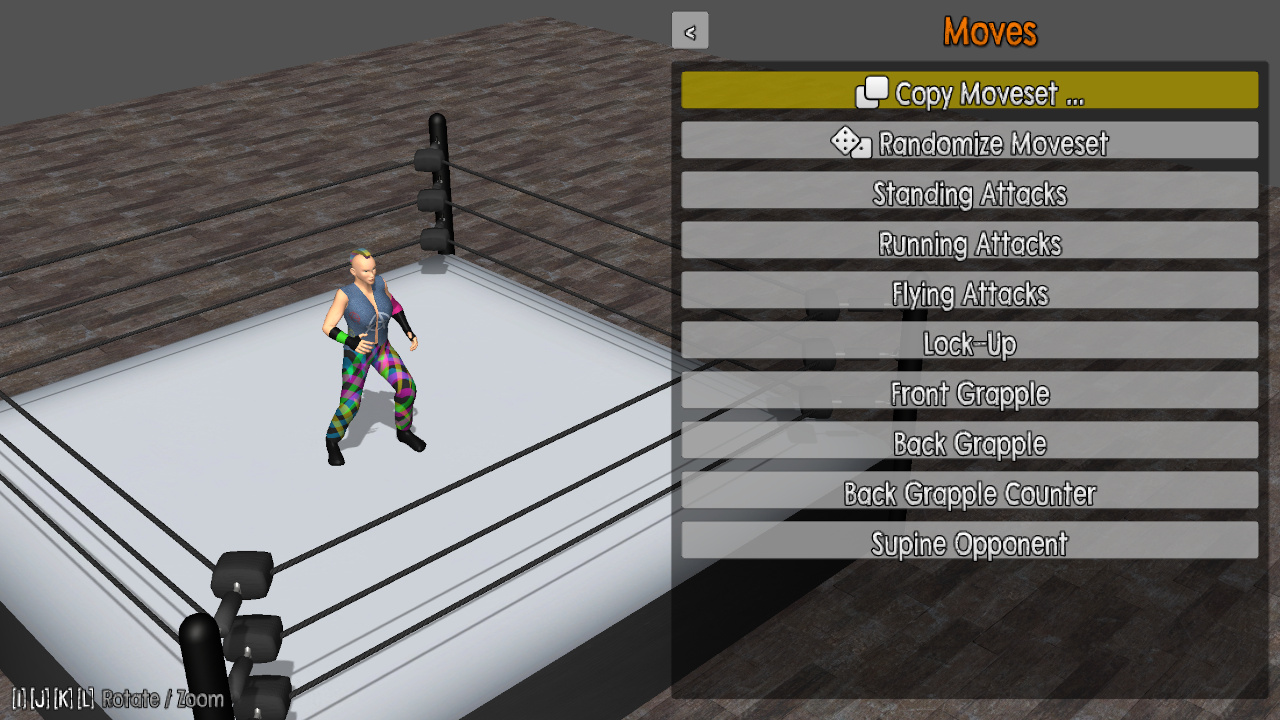
Your wrestler has various move slots containing the attacks and maneuvers that they can perform. Each slot corresponds to a certain input action, see Choose between moves for more information.
To get started quickly, you can use Copy Moveset to copy all the moves from another wrestler that you can select from the presented list. Clicking Randomize Moveset will pick a random move for every slot.
Stamp Painting
When you click Paint on an attire or your wrestler's skin, you enter the Paint menu. This menu is always in the context of an attire piece or your wrestler's skin.
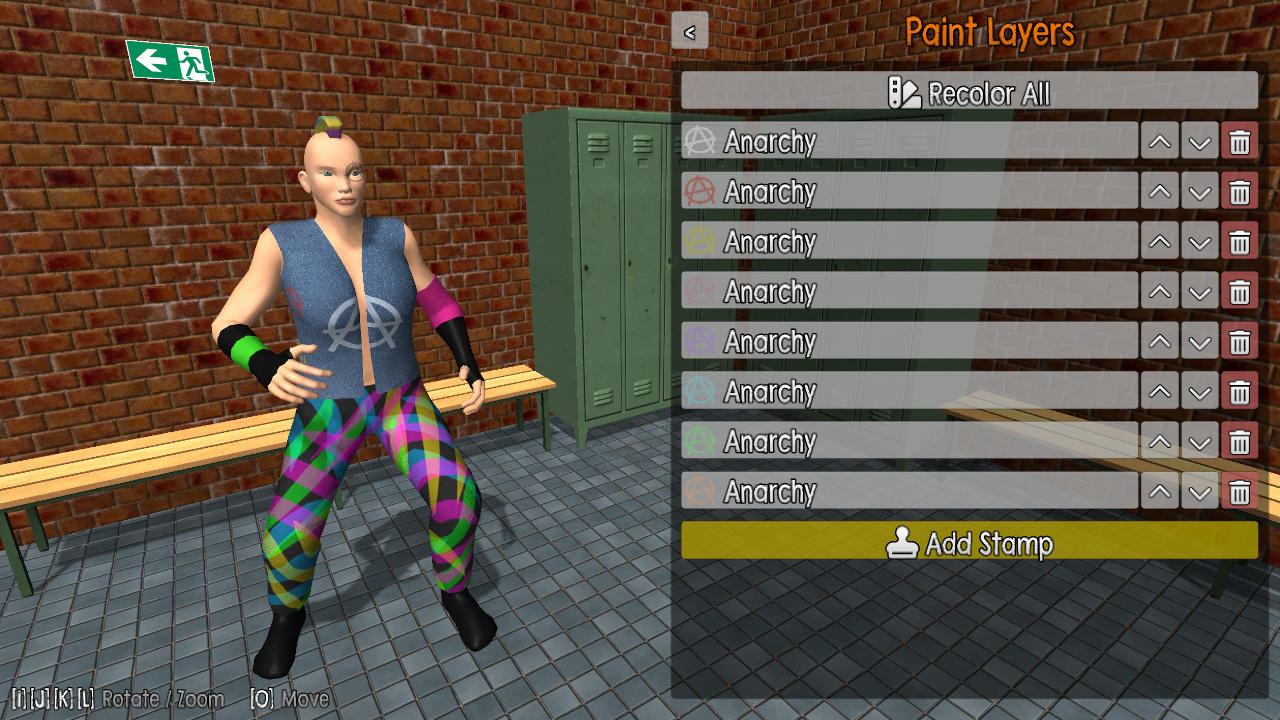
You can have an arbitrary number of layers that are shown in a list. A new layer is added using the buttons below (currently only Add Stamp). You can edit existing layers by clicking on the respective button in the list. By using the up and down buttons, you can change the draw order of the layers, and finally there's the option to delete layers.
Stamp Editing
When you add or edit a stamp layer, this is where you place and edit it. Your wrestler will go into T-pose to facilitate things.
The main stamp properties are as follows.
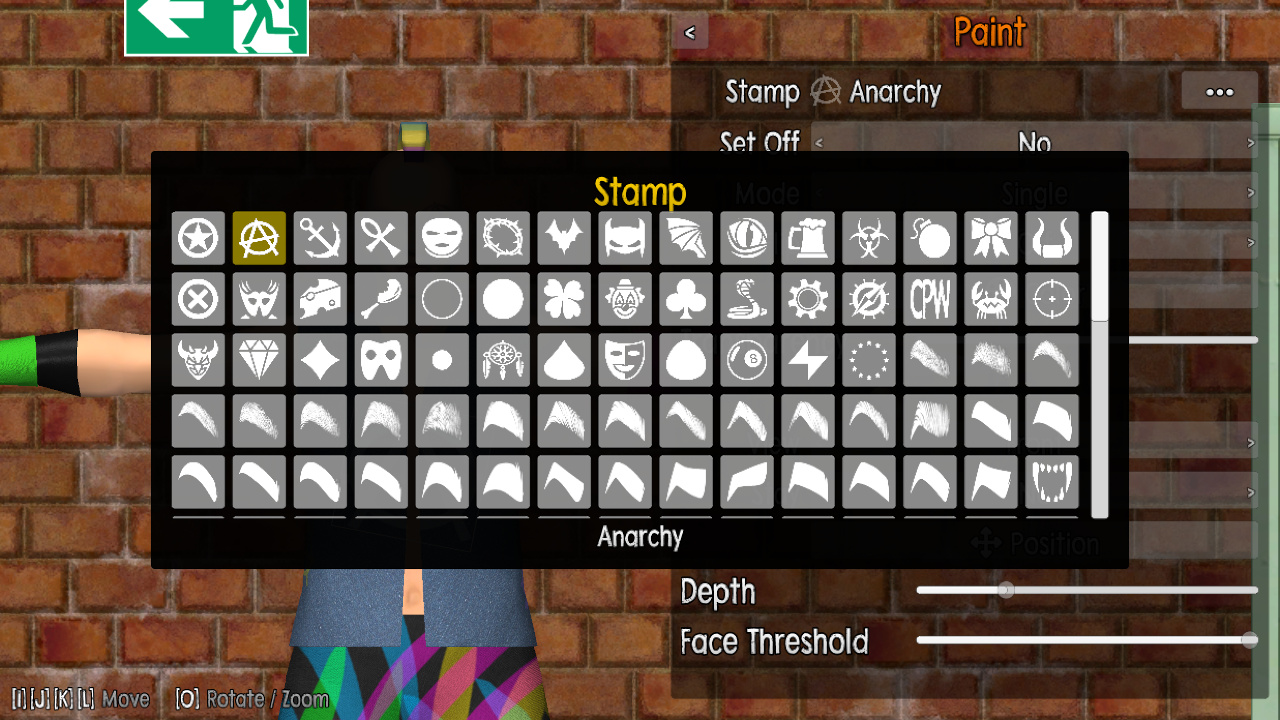
- Stamp: Opens the stamp selection as seen on the screenshot.
- Set Off: Toggles between just the stamp, and an offset variant that is useful in combination with filling to create checkerboard-like patterns.
- Mode: Determines how the stamp is drawn on the attire.
- Single: A single stamp is placed.
- Mirror: The stamp is mirrored along the top-down axis. This is useful, e.g., for placing two eyebrows symmetrically.
- Fill: The stamp is repeated over the attire.
- Flip: Allows you to flip the stamp horizontally, vertically or both.
- Color: Select the color with which the stamp is drawn.
- Transparency: Select the transparency with which the stamp is drawn.
Stamps are positioned on the attire using the following controls.
- View: Switch between 3D or various isometric views (front, top and bottom). Depending on where you want to place a stamp, selecting a different view and using camera controls can make it a lot easier.
- Stay: If set to On, the stamp will not be repositioned if you change the view or camera. This useful to preview your stamp from different perspectives, or to visualize the effects of Depth and Face Threshold.
- Position: Allows you to move, rotate and scale the stamp over the attire. This is mainly intended for gamepad input. Using a mouse makes placement a lot easier!
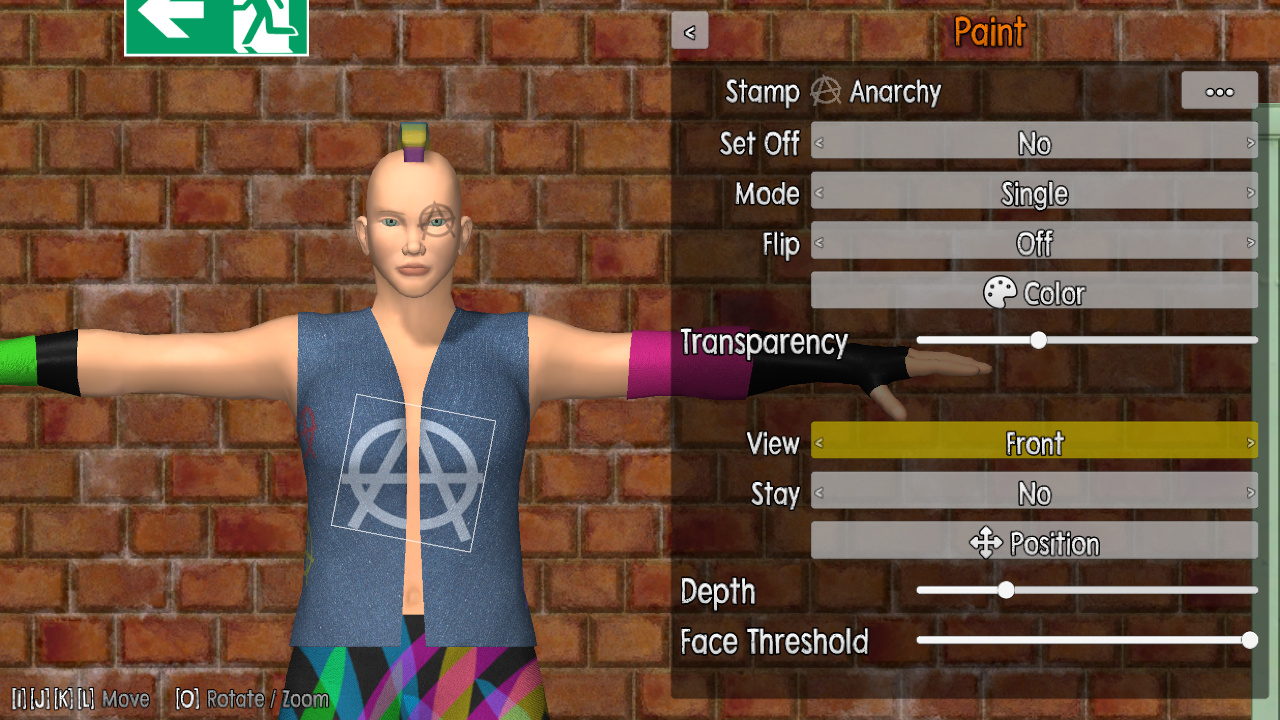
To understand Depth and Face Threshold, we need to go a bit into the technicalities of how stamps are placed. Consider the following screenshot where a stamp is edited (with the Stay option set to On to visualize things).
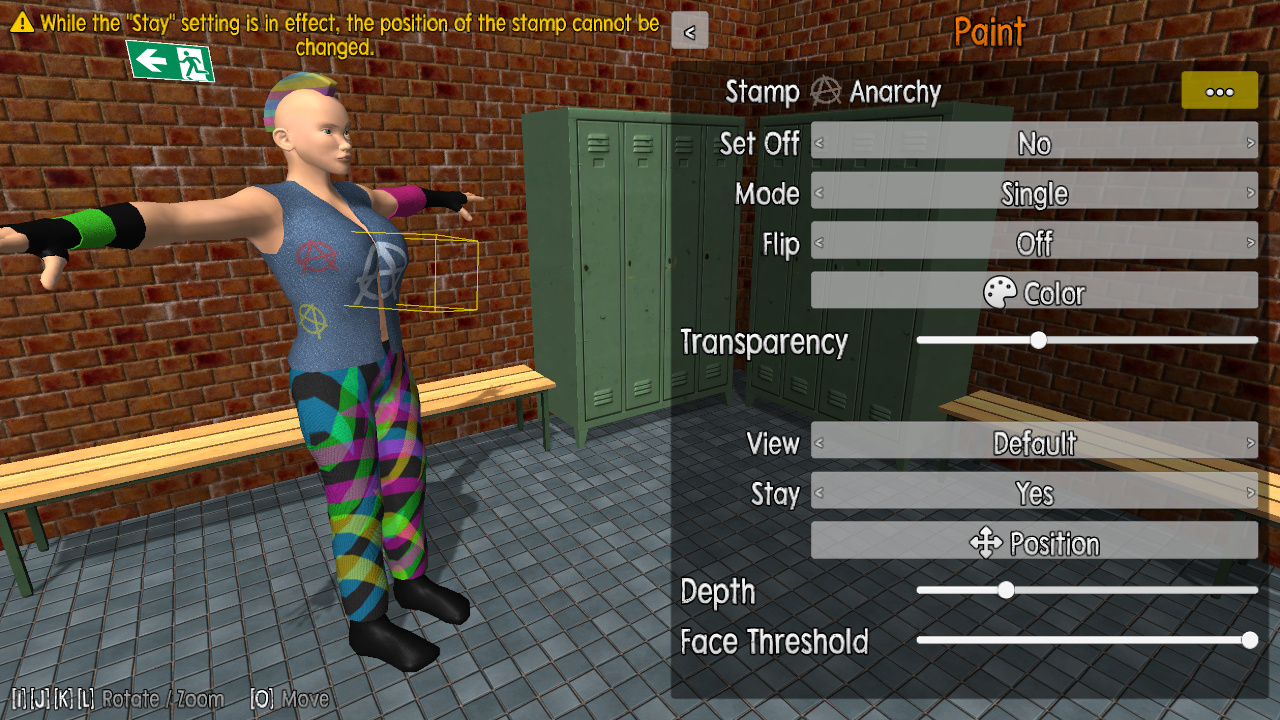
The yellow box reveals how exactly the stamp is placed: it is projected onto the attire using the box's position, rotation, width, height, and Depth. The Depth basically determines how far the stamp is pierced into the camera's direction when placing. Projection is further influenced by the Face Threshold: it determines the maximum angle at which the stamp may be projected onto the attire. Playing around with Depth and Face Threshold with the Stay option set to On and changing the perspective meanwhile will make this easier to understand.
A common use case of Depth and Face Threshold is setting both to maximum. Then, the stamp will be painted on both side of the box – it pierces through the wrestler, so to speak. Apart from that, it can be used to fine-tune the projection of stamps at difficult places like the hands.
Mouse Controls
Placing stamps is much easier using the mouse instead of a gamepad:
- Left Click on the attire and keep dragging to position the stamp.
- Middle Click or and drag use the Mouse Wheel to scale the stamp.
- Right Click and drag to rotate the stamp.
If you are using a gamepad, simply disconnect it to default back to keyboard & mouse input. Once you are done, you can connect it again.
Color Selection
The color selection allows you to pick a color using a hue wheel and a saturation and brightness square, similar to many painting applications.
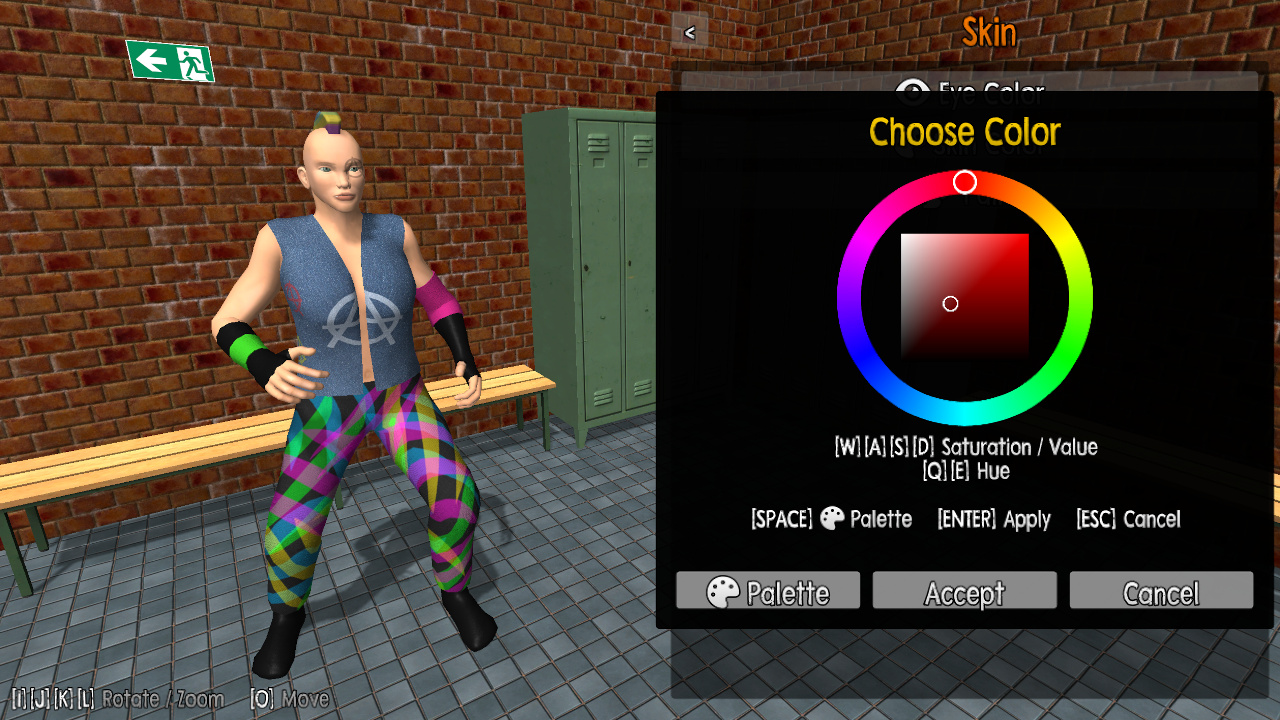
If you use a mouse, you can also click and drag on these controls.
Palette
The Palette gives you a list of colors that you have already used elsewhere on your wrestler.
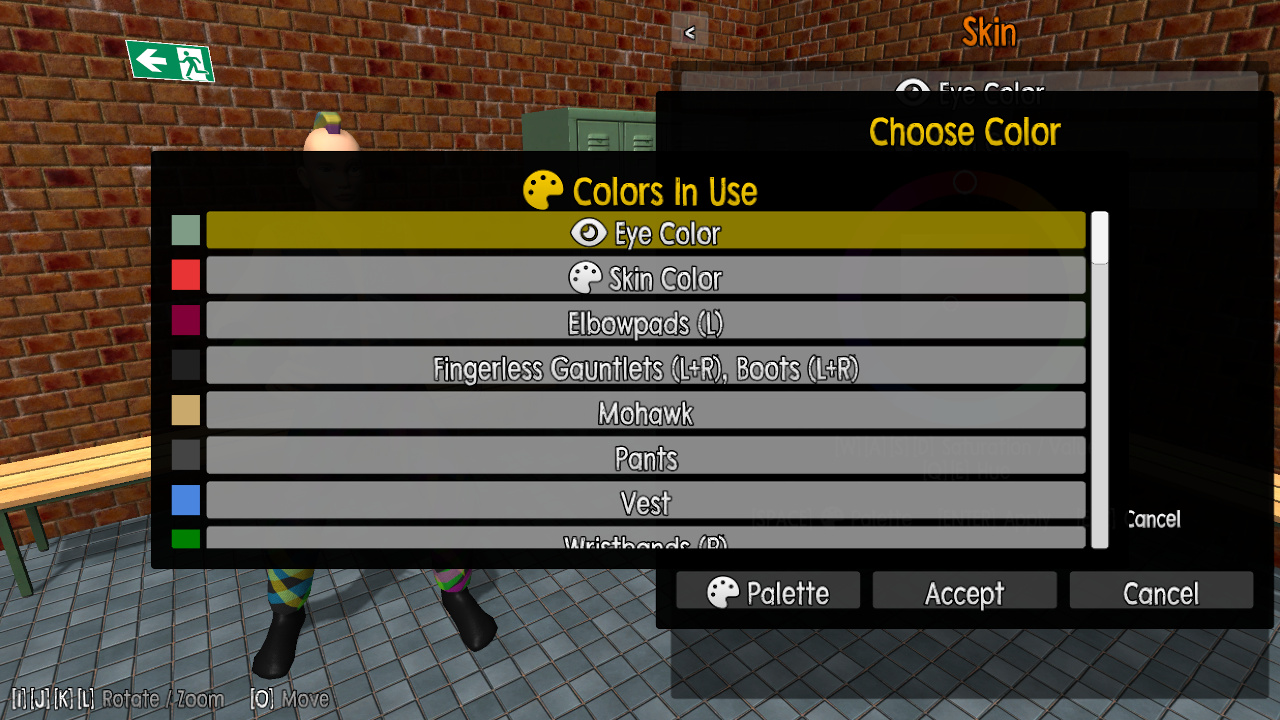
This is very useful if you need different attire pieces or stamps to have the same color.